It’s a long way to Sardis

October 8, 2020

While getting ready to play Marathon, I have started to ponder the lack of Persian cavalry.  Herodotus says that the Persians chose Marathon bay as a landing spot because it was ideal for cavalry action.  So, if nothing else,  Datis at least had cavalry in mind when he chose this landing spot.  Looking at the invasion force, the Persian army was limited indeed.  There were 600 Triremes in his invasion force.  At 30 “marines” per ship, it is not likely that this force had more than about 18000 men.  Given that this force also captured and sacked Eretria in the previous year, it is also likely that they did not receive any substantial reinforcements.  The PRESTAGS scenario sets their army strength at about 15,000 men, which is a reasonable number.  Given that Herodotus mentions only 600 triremes, a possibility is that there was no cavalry at all.

Lets assume there is cavalry.  One theory was that it was off foraging when the battle started.  If that is true, then what happened to the cavalry when the Persian army beat a hasty retreat?  They certainly did not get back on the ship.  A second possibility is that they were embarked on the ships before the battle started.  This would be a curious move since the whole of the Athenian army was on the field right there.  My theory is that this was an expedition to get a foothold in Greece.  There was no cavalry.  They would setup a camp and await reinforcements which would almost certainly include cavalry for a major invasion.   It certainly fully fits the narrative that Herodotus gives us.

The Greek army is easy to figure out.  10,000 Athenian hoplites and 1,000 Plataean hoplites.  There seemed to be no light infantry or archers in this group.  Certainly too few to matter if any.

This will be my first big test of PRSTAGS with my custom maps.  I am a bit concerned that the movement rates are a little fast for the slightly smaller battle areas.  I have a few ideas on how to correct that if it turns out to be so.

Finally, I’ve updated the first 4 maps with slightly better graphics.  The rivers are a bit smoother and the hills just look more natural.


Corinth and Mantinea

October 7, 2020

As the titles said, I’ve drawn the battlefields for Corinth and Mantinea.  You are probably wondering where the roads are.  Well, battlefield road marches were not really a feature in Ancient warfare up through the Medieval period.   This is because of the lack of formation drill that would allow a large formation of men to go from column to line quickly.  Roads, therefore, would be completely cosmetic.

I’ve added a different style of rivers as displayed the the Corinth map.

Corinth.  Both armies start within three hexes of their respective baselines. Allies on top and Spartans on the bottom.

Mantinea. Both armies start within three hexes of their respective baselines. Allies on top and Thebans on the bottom.

As usual, you can print these maps on US Letter paper at 90DPI.


PRESTAGS Custom Maps

October 6, 2020

I was fortunate enough to find a copy of PRESTAGS MasterPack for under $150 on EBay. It was missing the Spartan and Legion games. Fortunately, I had both. The gentleman selling the game actually recreated all the pieces and the counters were silhouettes instead of the usual horse heads and weapons.

The maps are large and leave a bit to be desired. Scenarios actually only use a small part of each map. I’ve come up with an idea to create custom maps. My source for terrain is based on the map drawings in Dr. Sabin’s Lost Battles book. Here are the first two maps: Marathon and Platea. Both can be played on a US Letter sized piece of paper.

Marathon.  Both armies start within three hexes of their respective baselines. Athenians on top and Persians on the bottom.

Platea. Greeks may deploy up to 6 hexes from their baseline. Persians setup on their baseline. Athenians are on top and Persians are on the bottom.

Marathon is a set piece battle. My standard rules is that no army can setup within 3 hexes of either flanking board edge and usually up to 3 hexes in from the base line.  The Persian Camp should be within a hex of the Bay of Marathon.

With Platea, the Greek armies can setup on either of the two forward hills but still cannot setup within 3 hexes of the left flank board edge.  The Persian armies will enter from the bottom of the board on Turn 1 after the Greeks have setup.

Maps printed at 90dpi should give something close to the 3/4″ hex that SPI used on their map.  It will nicely fit the 1/2″ counters.

This is my first post since WordPress messed with their editor. I can’t say I am a fan. They have automatic blocks. I am use to formatting everything myself. I need to figure out how to get the editor back into the previous mode…if that is even possible.


Finally, I have some direction!

July 19, 2020

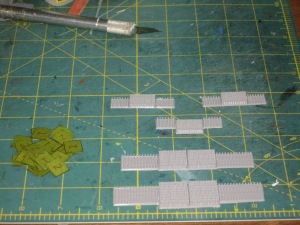
Since I’ve managed to get a 1-Hour Wargames set of rules I am happy with, I thought I’d get back to printing out some pike and shot figures on my trusty 3D printer.  I am using 12cm bases.  This fits exactly with the rules set Twilight of the Divine Right.  As these use a good many more bases I am going to start by finishing up bases for 1 hour wargames 10 per side.  Then, while painting and playing, I’ll keep the printer running for more miniatures for other battles, including Breitenfeld and Lutzen.

Top to bottom: Swedish brigade, 1500 man Imperial tercio, 2000 man Imperial or Spanish tercio. Also, some 2 sided hit counters reading 1 or 2.


Here we go again….again.

July 15, 2020

I finally managed to modify Neil Thomas’ One Hour Wargame rules down to a level that keeps with the vibe of the game.  The only departure to the rules is that I added a simple morale system.

I decided on each unit being eliminated upon taking its third hit.  It is easy enough to mark one or two hits with either a numeric marker or a two sided counter.  The third hit eliminates the unit so there is no need to mark that.

Determining the staying power of a unit on the average is also important.  I did what I usually do and assumed a chance to hit as partial damage.  So for instance, in normal conditions, a unit will be eliminated after the fifth turn of combat on the average.  I decided that if a unit took .67 hits per turn, it would acquire its third hit after 5 turns.  A simple table was developed so that a single die roll of 3+ would cause 1 hit.  A unit being attacked by a poor unit (D6-2) is eliminated after 9 turns.  So assuming .33 hits per turn would accomplish this.  So a roll of 5+ would cause a hit.  The final is a unit attacked by a superior unit (D6+2) would be eliminated after only 3 turns.  So this really is 1 hit per turn which would normally not require a die roll.  I decided to add some uncertainty.  So a 1 is a miss.  2 through 5 causes 1 hit.  A 6 causes 2 hits.  This fits neatly with the the rules since superior units can eliminate an adversary in 2 turns.  For half damage situations, 6 for poor, 5+ for average and 4+ for superior causes 1 hit.

Morale should not be overthought for this game.  When a unit takes a hit in melee, roll a die.  On a 5+ it must retreat 1 move.  This counts as that unit’s move for next turn.

This is the full play sheet.  Observe all of the rules and period specific rules from the book.  These modifications can be downloaded as a PDF here.

Turn Sequence

Move

Shoot if allowed

Melee if in contact

Morale for target if it took damage this turn

Move rates and Shooting Ranges

Infantry Move 6” Shoot 12”

Artillery Move 6” Shoot 36”

Cavalry Move 12” Shoot 6”

Combat

Die Roll

-2

0

+2

1

0/0

0/0

0/0

2

0/0

0/0

1/0

3

0/0

1/0

1/0

4

0/0

1/0

1/1

5

1/0

1/1

1/1

6

1/1

1/1

2/1

-2 column is for D6-2 combat. 0 column is for D6 combat. +2 column is for D6+2 combat.

The first number is damage for no cover/armor. The second number is damage for cover/armor/hill.

For double damage, simply roll twice and add the combat results together.

Units are eliminated after 3 hits.

Morale

Target unit retreats on a 5+ if it took damage in combat.

Cavalry will fall back if in contact with infantry at the end of combat.


Here they come! Action from 4:00 pm to 6:30 pm

April 18, 2020

And so the battle begins.  I’ve adjusted the terrain based on a map by Civil War Battlefield Trust.  Most of the positions of troops on the battlefield are based on the scenario layout in the original Fire and Fury miniatures game.

I’ve allowed the Confederate divisions an extra action (3 instead of 2) to represent the relative surprise of the attack for the first turn only.  The Union have their sharp shooters.  They cannot be represented by a physical body of troops because their were less than 500 on the battlefield in 2 regiments.  So at the end of a turn, the Union can place 2 “shots” on Confederate units.  The Union player rolls a die.  If the result is a 1, a stand is removed.  2-5 the unit in question takes a morale marker.  On a 6, the sharp shooter marker cannot be used for the rest of the game.  Sharp shooters are available for the first 4 turns.  I’ve reduced the penalty for a damaged battery from 2 to 1.  This is because a 12 gun battery has about the firepower of a single brigade.  When a brigade takes half damage, it is at a penalty of 1 for shooting.  Finally, I’ve allowed Sickles and Longstreet a couple of abilities other than just modifying the battle results.  First, they have the ability to make a single unit pass morale without rolling the die.  Units that receive the auto pass may not charge or move closer to the enemy that turn.  They may still shoot.  Second, when Sickles or Longstreet’s card comes up, instead of moving, they may order one of their divisions to move instead.  This is not an extra move for that division.  When the divisions card comes up, just ignore it.

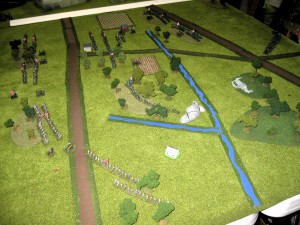
Battlefield is adjusted and the troops are ready to go.

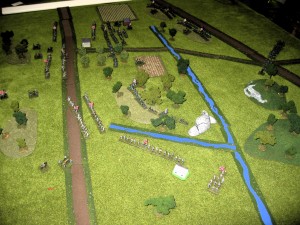
Rebels advance. Union gets a lucky shot in and Barksdale advances uncontrolled toward Trostle’s Farm.

Rebels come to grips with the Union troops. Heavy fighting up and down the line.

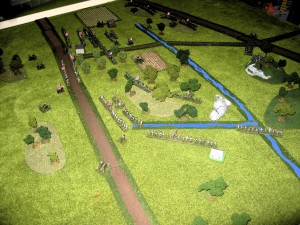
Rebels eject Birney’s division from Houke’s Ridge. However, casualties are mounting. Benning’s brigade gets hit by heavy ire from sharp shooters. McLaw’s division advance from the peach orchard but pays a heavy price.

Union troops arrive. Barnes division solidifies its position on Little Round Top uncontested.  Benning’s brigade manages to take Devil’s Den despite taking horrendous casualties.   Near Devil’s Den, Birney is mortally wounded while trying to rally Ward’s brigade.  The first officer casualty of the battle.  Ward’s and Carr’s brigade both were destroyed by this point.

Two brigades from Anderson’s division arrive to help bolster McLaw’s wavering attack. However, the last of the Union reinforcements arrive.


I think the sharp shooters were a good idea.  However, I think 1 attack per turn is plenty.  As it was, they destroyed 2 stands of infantry.  The other thing I did was make many of the Union troops have a 3 combat value.  Perhaps too many.  I wanted Sickles troops to fall back in disarray as they did historically.  That so far has not happened to the degree I would like.  Perhaps educing both of 3rd corps division to combat value 2 would do the trick.

To be continued….


4 PM July 2nd, 1863

April 11, 2020

I’ve finished up the southern most tip of the battlefield at for Gettysburg.  The scenario focuses mainly on the struggle to take Little and Big Roundtop.  Some of the engagement was cut out in order to spare my sanity as I will be playing this solo using OTR D6.  The Confederate forces will have McLaw’s and Hood’s division with some eventual reinforcements from Anderson’s division.  Ultimately, they will have 10 brigades plus 5 units of artillery.  Union troops will have considerably more but probably most will have few stands and not be as experienced.

I wanted to represent the batteries as 2 stand units but I’ve found I don’t have enough painted up.  I have the guns and crew…but only in silver.  I’m also a few command stands short for both sides.  That should be easy enough to fix.  probably a night’s painting.  Perhaps I can repurpose them as units leave the field.  Or as Joshua Chamberlain said, “Wait here.  Some will be available soon.”

I might get a couple of turns in tonight but more likely, this will be an Easter afternoon fight.

A view from the South looking North.


A lighter shade of OTR

March 4, 2020

By request, here is a copy of On to Richmond D6.  It is not a faithful reproduction of the rules as the randomizer is a D6 instead of a D10.  The morale and melee system have both been reworked and streamlined.  Enjoy!


My Favorite Rules Pt3b Artillery

March 1, 2020

Artillery generally has a maximum range of 4 times the maximum range of muskets. So if a musket has a range of 8″, then artillery has a maximum range of 32″.   A battery should be represented by a single gun model and 3-4 figures.  Each figure is representative of a single section.  This is particularly useful when trying to distinguish between a horse battery which typically had 3 sections and a field battery which usually  would be 4 sections.  British batteries always have 3 sections regardless of type.

Artillery ranges are close(2+), short(3+), medium(4+), long(5+) and extreme(6+).  A die is rolled per figure in the battery with each successful hit being a casualty.   There is a penalty of 1 when firing at other artillery and skirmishers.

Field artillery move at the rate of line infantry and may not fire on any turn they move more than 1″.  Horse artillery move at the rate of light infantry and can not fire if they move over half of their movement.

Close and short range cover the same range band.  If we have a 32″ range then close range is 4″, short is 8″, medium is 16″, long is 24″ and extreme is 32″.

That is about it for now.


My Favorite Rules Pt3 – Combat

February 29, 2020

Combat, be it melee or shooting, can share most of the same mechanics. I went back and forth with whether or not their should be a saving throw. Given that most simple games do, I thought I’d be different and dispense with them.

Lets take shooting first. I read once in an old Strategy and Tactics magazine, the one with the game Ney vs Wellington, that a musket was about 95% accurate at about 40 yard, 45% accurate at 100 yards and 5% accurate out to 200 yards. These are probably generalizations. I do agree that accuracy falls off at about 50 yards. The musket is probably not the limiting factor. It is the MK-I eyeball, the optical range finder that has not changed since the dawn of humanity that limits accuracy. Even in todays modern military, a firefight rarely occurs outside of 300 yards, which is the same range that firefights developed during the American Civil War.

I digress. The accuracy numbers are almost certainly only valid for a man who has no pressure and plenty of time to aim. For our purposes, we can fudge these into probabilities on a six sided dice. At close range, even under duress, a man can remain pretty accurate. So at short range, a roll of 3+ is a successful hit on a target in the open. Since we have no saves, a hit is a “kill.” At medium range, a 5 or 6 on a six sided die is a hit. We could over think this and say that 2 hits are required for 1 kill at long range and only a 6 is a hit. We are playing a game here. A 6 is required to hit.

We could say that we roll 1 die per figure shooting. That would probably result in a rather quick game. I’ve seen 1 die per 2 figures in games that had saving throws. I think for our game 1 die per 3 figures is good enough. At close range casualties will mount quickly. At longer range casualties will almost certainly mount slowly resulting inn a prolonged firefight. Round up the number of dice because this is being designed for a collection based as 3 figures per stand. So really you are rolling 1 die per stand.

Ranges can be whatever you want but short range is out to 1 quarter maximum range. Medium range is out to half maximum range. Long range is out to maximum range. Generally there can be a cover penalty of -1 or -2. -1 is appropriate for most cover. The target could be woods or inside a wooden building. -2 should be reserved for the toughest of cover such as trenches or higher stone walls. If the modifier puts you at a 7 or more to hit, then your fire is ineffective. It may seem a little harsh but it keeps a player from fighting the action at Marye’s Heights from long range. The player will have to move in close just to hit the enemy at a disadvantage while the enemy will likely delivering casualties at twice the rate!

You are probably wondering, “What is with the to hit numbers anyway?” 3+ is twice as likely as 5+ while 5+ is twice as likely as 6+. With that, we can ow discuss the melee, which units will hit on a 4+ in an even fight.

With melee you can have a list of situations that may favor one side or the other. Sum up the totals that apply to each side. If the difference is 1, the disadvantaged side hits on a 5+ in melee while the advantaged side still hits on a 4+. If the difference is 2 or more, then the advantaged side hits on a 3+ while the disadvantaged side hits on a 5+. I don’t want to make this too granular. Melee is messy. Casualties are always going to be inflicted on both sides.

In a melee, one side or the other must win. There are no ties. If the casualty totals are even, the attacker is repulsed. Otherwise, the victor is the side that inflicted the most casualties. This total for victory purposes can be increased if a general or other supreme commander is in the fight. He will usually add 1 or 2 to the total for victory point total calculations.

Finally, you are probably thinking that melee should be more bloody. Well, it has been shown time and time again that hand to hand combat was rare and short. One side or the other usually broke before the enemy came to grips. When combat did occur, other engagement would be resolved quickly.

That is enough for tonight. I would like to thank Vincent Tzao for kicking me into gear. 😉